10 steps to create and sell online courses you’ll be proud of
By Pam Neely August 30, 2022
Online courses are hot – and they have been for years now. According to Thinkific’s 2022 Online Learning Trends study, “Online content creation is the most popular type of business that people aspire to launch (51%), beating out selling products online (49%), providing services online (49%) or in person (46%), and opening a brick and mortar store (39%).”
This isn’t all just hype, either. Creating and selling an online course isn’t all that hard to do. There are online course platforms available now that make delivering a course super-easy, and once you know a few tricks, even creating the course content doesn’t have to be a big deal.
You don’t even need a huge online audience to make it work, either (though having an audience definitely helps!). Back in 2019, about a third of online students were attending courses created by people with less than 10,000 social media followers. In 2021, that percentage was up to 62%. So most of the students taking online courses now are taking those courses from people with relatively small audiences. So don’t let having a small audience hold you back.
You may not need a huge audience to have a successful course, but you do need to get a few things right while you’re planning, creating, and selling your course. To help you out, we’ve got a step-by-step plan for how to finally create and sell your own online course (whether it’s free or paid) and how to do it without spending a lot of money or taking a lot of time.
All in, you can probably create a very simple course in a weekend. A more detailed course could take a month or more to create. But either way, having an online course could definitely be worth your time.
The benefits of creating an online course
Having an online course can be a life-changing — or at least a business-changing — thing. There are several reasons why:
- Online courses save you time. Whether your course is free or paid, once it exists, you’ve got a way to demonstrate your expertise on autopilot. People can be taking your course while you do other things, like creating your newsletter, or playing with your kids. And if your course is paid, that also means you can be earning money from your course while you’re doing other things. And as we’re sure you’ve heard, passive income is a pretty awesome thing.
- Online courses open doors. Even a simple autoresponder-based course can be a terrific way to promote your work. Free courses can be used to promote paid courses, too. Courses can often serve as marketing tools on their own, especially if you publish your course on one of the large course platforms.
- Online courses demonstrate your expertise. Courses can also be a great way to educate people about how to work with you, or to give people a sense of what it would be like to work with you. For instance, a graphic designer could create a course about visual branding, or how to design a logo. This would be an ideal way to demonstrate the value of the designer’s work and let the designer help people (and earn money from people) who can’t afford to hire her.
- Courses can be ideal complements to other types of content. Many authors create courses that complement their books, for example. This gives people a way to apply what they’ve learned in the book, or to study the topic in more depth. It also gives the author a way to build their email list and make more money from their experience. Once they’ve written a book, making a section of that book into a course isn’t terribly hard.
Those are just a few reasons people are creating courses now. You may discover a few more once your course is launched.
So let’s make that course happen. Here are ten steps to creating and selling an online course that will give you the benefits you want.
1. Choose your topic
There are a lot of courses available. For example: Want to play the harmonica? There are 55 courses to show you how, just on Udemy. Another big online course platform, Domestika, has 48 courses just on lettering. Or a quick online search could help you find a way to master indoor shrimp farming or get outdoors for some African animal tracking.
So don’t be shy about picking an unusual topic. Weird is okay, so long as there’s enough of an audience to make your course worth creating.
If you’re not sure what you could create a course about, here’s an easy exercise to find out.
On a plain sheet of paper, make three columns:
Topics I know more about than the average person | Topics I could happily talk about for at least 3 hours | Topics that have at least a couple of books already published about them, or a magazine on the subject, or at least three Facebook or other online groups dedicated to the topic |
Gardening | Herbs | Herbs – hundreds of books |
Decluttering | Decluttering | So many books about decluttering. There’s even a few TV series about decluttering. |
Fill out the columns for at least five different topics. Why five? It’s good to have a few ideas to work with so you can stay open to the course topic most likely to succeed.
Now, ask yourself: What’s the need? Would someone take a course about this topic out of curiosity, or because they have a problem to solve, or some other reason?
Maybe you could create a course about how to create fantastic holiday cookie gift tins — and people would buy that because it’s a fun topic. Completing your course is something they’d really enjoy.
Or maybe your topic is more problem-centered. Maybe you’re thinking about a problem like how to keep a house clean in just two hours a week, or how to recover from knee surgery, or how to talk to a teenager.
What problems exist around these topics that people want to solve, but they haven’t been able to solve up until now because they think it will be too hard, too expensive, too likely to fail?
When you’ve got a few topics and the why behind why someone would take a course about this topic, then you’re ready for the next step. (Don’t skip the why! It’s super-important.)
2. Choose your audience
Who is your course for? Again, don’t skip over this — the more specific you are about who your course is for, the more likely you are to be successful.
For example, take the topic of “how to talk to your teenager.” Could that be for parents in general, or for single parents, or for single dads, or for single dads who just got a divorce?
People respond to courses that are laser-targeted to their needs. The most common question a prospective buyer (or even a free course taker) will have about your course is this: “Is it right for me?” Even if you’ve got a lot of raving testimonials and great course content, everyone who considers your course will still be asking themselves, “is this course right for me?”
The better you target your audience, the more likely it is that people will feel confident in taking it.
Pro tip: Go find a few popular courses on a public platform like Udemy. Then think about how you could do a course about that same topic, but for a specific target market. Your target market can be a demographic (urban men 28-35), or for people who share a common attribute, like “How to grow great houseplants – even if you tend to kill them.”
3. Confirm there’s a market and interest in your course
OK — you’ve got a great course topic, and you know exactly who your course is for. Now, let’s make sure there’s enough interest in your course to make it worth creating. Nothing stings more than creating a full, fabulous course… only to find out no one wants it. And sadly, while this is a common piece of advice, many course creators still ignore it.
So go find at least a few people who say they’d be interested in your course.
Here are the three best ways to do this:
- Search for competitors.
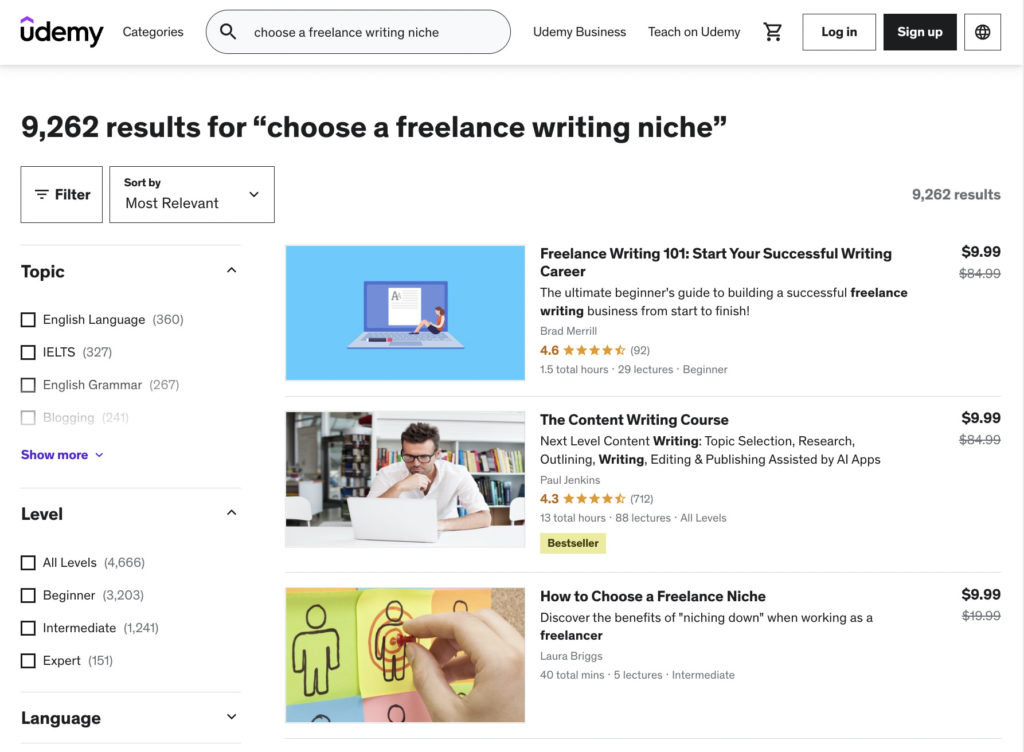
Go to Udemy or any other major course platform and just do a search for what your course could be about. For example, here’s a sample search on udemy for “choose a freelance writing niche.”
- Google works just fine for this, too. Just Google “[your topic] course” and see what turns up. Also try a few searches on YouTube and Instagram.
If you find a few courses, try to see how many students they have. Sometimes this is easy; other times not so much. - Ask.
Even if your audience is small, ask them if they’d be interested in your course. Or borrow someone else’s audience – many Facebook group admins will let you post a question like this in their group, especially if you contribute to the discussions a lot.
If you’ve got a little bit of budget, you can also run ads to your target audience to see if they’d like your course. You might have to do a “dry test” – aka “pre-sell your course” to really know how interested people are. Or you can offer a lead magnet that’s basically a slimmed down version of your course. If the lead magnet does really well, people are at least interested in the topic. - Find high-interest topics that don’t already have courses.
This is a little riskier, but just because no one’s made a course on a certain topic doesn’t mean you can’t be the first. Just be cautious — if no one has created a course on your topic, there may be a reason.
The best places to find hot topics are via Amazon book searches, YouTube top searches, and (sometimes) hashtags on social media platforms like TikTok and Instagram. Facebook groups can be another rich source of information.
4. Find out what people want to know
This is yet another critical part of creating successful online courses that a lot of people miss. They’ll go through the entire process of creating a course, write up their sales page, pay good money to send people to that sales page, and… no one will buy.
Lack of sales can be caused by a lot of things, of course, but really it comes down to this: You’re offering something people don’t really want. And so while picking the right topic and the right audience are key to this, so is including what people want in a course.
This is a little more work than just leaping into content creation, but boy, is it worth the time. And it will take some time. Here are the three best ways to get this done:
- Talk to potential students.
Ideally, you’ll have an email list of people (even a couple hundred people is enough) and you’ll have sent out an email asking if anyone is interested in this course idea you’ve got.
Say ten people respond that they are interested. You get back to these potential students and try to get them on a Zoom call or a phone call to talk to them about what they’d like you to include in the course. If you can, record those conversations. If not, take the best notes you can. If you have to pay them, do it.
Getting people to talk to you directly is the best way to find out what your course should include. You’ll learn an enormous amount about your audience in just a few calls.
- Do a survey.
Again, you can do this with an email list. Or you can try to get people on social media to respond to a few quick polls.
- Go to online groups (Facebook groups are the easiest to find).
See what people are talking about. See which posts get the most engagement. See what people are asking about.
5. Define the transformation
Sounds dramatic, right? “Define the transformation” means find a way to concisely explain how people will be different after they take your course.
This is a critical but oh-so-often overlooked part of creating and selling online courses. You see, people don’t really care how much content you’ve crammed into your course. They don’t care if you’ve got 90 hours of video and 23 workbooks and 45,000 words of text-based lessons. All that might actually make them less likely to buy your course.
Most people just want to get from point A (where they are now) to point B (where they want to be). The more efficiently your course gets them from A to B, the more they’ll want to take it.
So work on how to explain this in a way that’s crystal clear. Do this before you start creating content.
As you’re “defining the transformation,” really what you’re doing is building a path for people through your course’s content. You’re giving them (and you) a goal. You’re also saving yourself so much work.
There’s another benefit to thinking of your course simply as taking people from A to B: It helps you write your sales page and all your marketing materials. But more on that in a moment.
6. Block out the sections and lessons of your course
Now it’s time to block out your course’s lessons. But before you start creating content, do yourself a favor: Establish a structure.
Block out three to five major sections of your course, with each section having three to seven lessons. That’s enough material for your course to feel meaty, but still concise enough so people don’t get overwhelmed. And people can definitely get overwhelmed with course content. If you tend to “overdeliver,” be aware of this — do yourself and your students a favor and keep your content brief.
Once you’ve got your course’s sections and lessons blocked out, it’s time to figure out what each lesson will cover. Aim for three to seven key points for each lesson.
Brevity is your friend here, too: People will zone out if a lesson is too long. Try to have your video lessons be 10 minutes or less (15 minutes, absolute maximum), and your text based lessons no more than 1,500 words. Your students should be able to finish each lesson in your course within about 15 minutes or less.
With 15 minutes per lesson, four lessons in each section, and four sections, you’ll end up with about 4 hours worth of content (15 minutes x 4 lessons for each section = 1 hour for each section). That’s plenty of time to deliver a lot of value, but a short enough period of time to make your course feel manageable.
Pro tip: Remember how you defined a transformation that people will go through as a result of taking your course? Apply that principle to each section of your course and each lesson of your course. You might even open each section of your course by saying, “by the end of this section, you’ll be able to [that section’s goal].” You could also open each lesson with, “By the end of this lesson, you’ll be able to [that lesson’s goal].
The whole “point A to point B” structure will help you create a course that’s more concise and valuable, but it also will help your students feel like they’re making progress. That’s a powerful way to keep them motivated so they complete your course, get results, and have a positive experience (so they’ll leave you a great testimonial, and so you’ll sell more courses).
7. Get it out on paper, or video, or audio — or all three
You’ve got that outline… now it’s time to fill in the blanks.
Many courses are video-based, but also have a text and audio version of each lesson. Depending on your course topic and how comfortable you are on camera, you can either do “talking head” videos, or you can create PowerPoint-like slides and just record your voice explaining the slides, or have a little inset of yourself so that people can still see you.
If you’ve got a bit of budget for your course, consider getting your videos edited. This will improve your students’ experience of your course. Also consider using an audio to text transcription service like Otter.ai to make text drafts of your video lessons. And if you’re really short on time, take those text transcripts of your videos and hire a freelance writer to clean up the copy so it reads well.
8. Decide whether your course will be free or paid
Free courses are good if you want to get a lot of people into them. Or you can use a simple free course to promote a paid course.
If you are doing a paid course, you’ll also need to decide how much it will cost. And if it’s more than $400 or so, you’ll also need to decide if you’re going to offer a payment plan. Payment plans tend to split the cost of a course into thirds, and they usually add about 15% of the value of the course for the payment plan. So if your course costs $397, a payment plan would break into three monthly payments of $147 each.
If you publish your course on one of the large public course platforms (like Udemy), you’re basically offering a hybrid of the free versus paid course. There will be a charge for your course, but it’ll be so cheap – $9.99 – that the risk for the student is very low.
Courses on platforms like this can make money, but you’ll need hundreds or thousands of sales to generate any meaningful income. That said, a low-priced course on a big platform can be an excellent promotional tool for your work or for a more expensive course you offer elsewhere.
Another play is to price your course super-low or for free when you first launch it. This gets at least a few students into your course, so you can get lots of feedback from them and hopefully a few really strong testimonials. Then you re-launch your improved course, with testimonials, at a higher price. All this takes longer, but it will probably get you better results in the end.
Note that paid courses also typically have some kind of refund terms, and those terms are going to be very important if your course costs more than even $27. Refund terms can also vary a lot, but they tend to fall into three types of refunds:
- No refund.
This is the least attractive option for potential students, but there’s no way people will misunderstand the terms. You may need to give prospective students a free lesson or two, just so they can see for themselves that your course is worth the money. - A 7-day refund.
This is a good compromise for both students and teacher, because the students get access to the course and the teacher has very clear terms for the refund. The drawback is some teachers may be concerned that people will just zoom through the course, download all the materials, and then ask for a refund. - The “do the work, get the results” refund.
For this option, students have to complete the course before they can ask for a refund. The idea here is that when a student buys the course, they’re entering into a contract with themselves and the teacher — buying the course is a commitment to do the work. Students are eligible for the refund only after completing the course and only if they can honestly say it didn’t work for them. The sales pitch is that this is being offered because the teacher is 100% sure that if a student just shows up and does the work in the course, they will absolutely be successful and get their money’s worth. You’ll need to spell out the terms of this very clearly or some students may complain.
Once you’ve decided whether your course will be free or paid, and if paid, the terms of the sale, then you’ll be halfway towards figuring out how you’ll deliver (aka “fulfill”) your course.
9. Set up how you’ll deliver your course
There are four ways to deliver your course. You can:
- Use a course builder platform like Thinkific or Kajabi
- Host the course on your website with a WordPress plugin (or with Wix or SquareSpace integrations)
- Publish on a course marketplace platform like Udemy
- Set up your course as an email autoresponder (aka an “email sequence”)
Here are the pros and cons and costs of each of these options:
COURSE DELIVERY METHOD | PROS | CONS | COST |
Course builder platform | You won’t have to worry about the technical set up of your course. You’ll have a full-featured course platform — complete with assignments and even a private forum — to build a great experience. | You’re tied to the platform, and there can sometimes be limitations with what you can do. | There are free plans on these platforms (both Teachable and Thinkific have free plans), but they’re limited, and they’ll charge you fairly high fees for each course you sell. |
Host the course on your website | If your site is WordPress, you can install plugins like LearnDash and MemberPress. You can also have a course on Squarespace or Wix, but unless your site is already on one of those platforms, you might want to go with a different option. | You will need to install, configure, and maintain your course’s back end, in addition to all the other tasks of managing students and maintaining course content. | Around $179 to $199 for MemberPress or LearnDash. There are many other course plugins and add-ons available; a few do have free plans or trials, but that usually means there’s little to no tech support. |
Publish on a platform like Udemy | You get a great, highly visible platform for your course, immediate recognition of the course’s platform, and some marketing support. | You’ll have to follow the platforms’ rules and requirements. The platforms can take as much as 50% of each sale you make. And you won’t usually be able to sell higher-priced courses. | The costs are low to free, but again, the platform will take half the value of your sales. Some platforms take even more. |
Use an email autoresponder or email sequence | You can control almost every aspect of your course, and offer personalized course materials, almost like a “choose-your-own-adventure course curriculum. You can also completely avoid the fees of the course platforms, and guide your students to anywhere on the web you want to take them, whether that’s to private video content, monthly Zoom calls, a Facebook group — wherever! An email sequence is also a great way to deliver any other digital products you have. | You will have to understand how to set up and manage an autoresponder (or hire someone to set it up for you). | Free… if you use just one autoresponder. Otherwise you’ll need a paid email marketing tool. Fortunately, you can get one for less than $20 a month — and you’ll get landing pages and all the email marketing tools you need to build and monetize an audience. |
10. Give people a way to sign up for your course
This can be as simple as creating a sign-up form for an email sequence, or it might mean configuring a shopping cart in an LMS learning system on your WordPress site.
You’ll also need to decide if you want to use Stripe or PayPal so people can actually give you money. Or if you want to offer both.
That sounds like a lot, but it doesn’t have to be a big deal. Any online course platform like Thinkific or Teachable will have a payment system pretty much set up — you’ll just need to add a few things to configure the check out, and you’ll be done. And if you’re selling on Udemy or one of the other public course platforms, the entire set up is done for you. You’ll just need to add which PayPal account or Stripe account to send your money to.
Setting up a sales page for an autoresponder-based course is fairly easy, too. This video walks through exactly how to do it, step by step, in about five minutes. If you wanted to write out a full sales page, clearly that’ll take a little bit longer, but the basic setup to give people a way to buy your course is really pretty easy.
Ready to get started?
So now you know how to create and sell online courses. There are a few steps to it, but you really could create a simple course over a weekend — especially if you’ve already got some content created in other formats, like in a book or blog posts, or even in short videos.
Usually the big thing blocking people from completing their course is they overcomplicate it. They overdeliver.
So keep it simple. Create a good, simple course and see how well it works for you and your students. If you’re getting good results from it, then go back and expand the course. Improve on what’s working.
Mercy
9/1/2022 11:13 amContent quite helpful. Thanks
Natasha
9/2/2022 5:11 amThis was very imformative.
Thanks