How to Move from Mailchimp to AWeber
Connect with your customers, grow your business, and save time when you switch from Mailchimp to AWeber.
Need an AWeber account? Sign up for AWeber Free Today!
Most people put off switching email marketing providers because the task seems overwhelming. Maybe at other providers that’s the case, but not with AWeber.
This guide will walk you through step-by-step how to seamlessly transition from your current provider to your new home. 🏠
Need more help? Our customer solutions team is available 24 hours a day, 7 days a week to answer any questions you might have. You can email us, live chat with us, or give us a call. Never feel stuck. We’re here when you need us. Contact us.
Make the switch in THREE easy steps.
1. Set up your AWeber account.
2. Move your subscribers to AWeber (we can help).
3. Customize your content.
Let’s get started!
(Prefer to watch step-by-step videos on how to get started? Check out our AWeber Academy video course.)
Step 1: Set up your AWeber account
Log in to your AWeber account and set up your first email list. This only takes a few clicks, and we’ll walk you through it when you first log in.
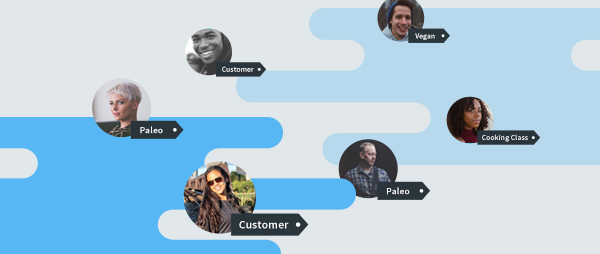
Think of a list as a way to group your subscribers (or contacts). You can create smaller groups within a list by using tags (or labels) to build subscriber segments.
Or, instead of using tags, you can create a separate list for each group of subscribers. AWeber offers the flexibility to structure your account your way.
You can also create an unlimited number of sign up forms in any list. We understand this was a limitation with Mailchimp forms, requiring you to associate one form per list.
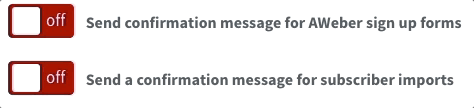
About Confirmed Opt-In
Confirmed opt-in is a setting that requires your subscribers to confirm they want to be on your email list. If you have this setting turned on, people will automatically receive an email when they’re added to your email list. This email contains a link or button that your subscribers must click to confirm they want to join your list.
In most cases, confirmed opt-in is optional. If your Mailchimp subscribers already opted-in to your list, you can import them without requiring them to opt-in again.
In your list settings, you can toggle confirmed opt-in on or off for your signup forms and imports. If you have not emailed your list in a long time, we recommend asking them to confirm their subscription again.
To learn more about how to import without opt-in, and when and why you might want to consider keeping confirmed opt-in on, check out this article.
Step 2: Move your subscribers from Mailchimp to AWeber
Moving your contacts from Mailchimp to AWeber is simple. Here is the simple process of exporting from Mailchimp and importing to AWeber. Or we can do it for you with our free migration services.
Export your contact lists from Mailchimp
You can download all of your contact lists from Mailchimp as a CSV or Excel file.
When downloading the lists, you can choose which fields and custom fields you want to include in the file.
↪ Follow these directions from Mailchimp to export your contacts.
Pro tip: If you plan to ask subscribers to re-confirm their subscription once you add them to AWeber, you might want to send your subscribers an email to make them aware of this. You should send this final message from your Mailchimp account.
This message should let them know to expect a confirmation email, and invite them to re-confirm if they still want to receive your emails. Be sure to remind them of the benefits of your emails and the value you provide and will continue to provide!
Import your contact lists into AWeber
Log in to AWeber, hover over the Subscribers menu item, and select Add Subscribers.
Choose “Import More Than 10 Subscribers,” upload your CSV or Excel file from Mailchimp, and follow the on-screen instructions to add your contacts.
For a more detailed how-to, check out this article here.
You can only import one file at a time. If you exported multiple email lists in Mailchimp, create a corresponding list for each in AWeber by creating a new list.
If you’d like to combine your Mailchimp lists into one, you can import each file into a single list by repeating the import steps.
Step 3: Customize your forms, landing pages, emails, and automated campaigns
Now, your subscribers are ready to receive your awesome emails from AWeber! Just a few more steps to finish things up.
Switch out your Mailchimp sign up forms and landing pages
If you have forms on your website or landing pages that add new subscribers to Mailchimp, you’ll want to replace them with AWeber forms and custom landing pages. This will ensure that any new subscribers end up on the right list in the right account.
For sign up forms, log in to AWeber and click the Sign Up Forms tab and click Create a Sign Up Form.
Follow the on-screen instructions to build and customize your form. Once you’re done, grab a small snippet of code to add to your site wherever you currently host a Mailchimp form.
For step-by-step instructions, check out this article, or contact our 24/7 live support team.
For landing pages, you can click Landing Pages and click Create a Landing Page. It’s that easy.
Choose an email template
When you are ready to send a one-time promotional email or newsletter, you’ll start by creating a draft and scheduling it. We call one-time emails broadcasts. Mailchimp refers to these as campaigns.
AWeber has hundreds of email templates to choose from. We recommend customizing one of our templates to match your brand.
See a few examples here, or watch our short videos on how to choose and customize a template.
Switching providers presents a great opportunity to build a new modern template from scratch. But if you have a custom Mailchimp template that you’d like our design team to recreate, we recreate it with our free expert migration service.
Once you have your template built, save it for reuse anytime you plan to create a new message.
Build your automated email campaigns
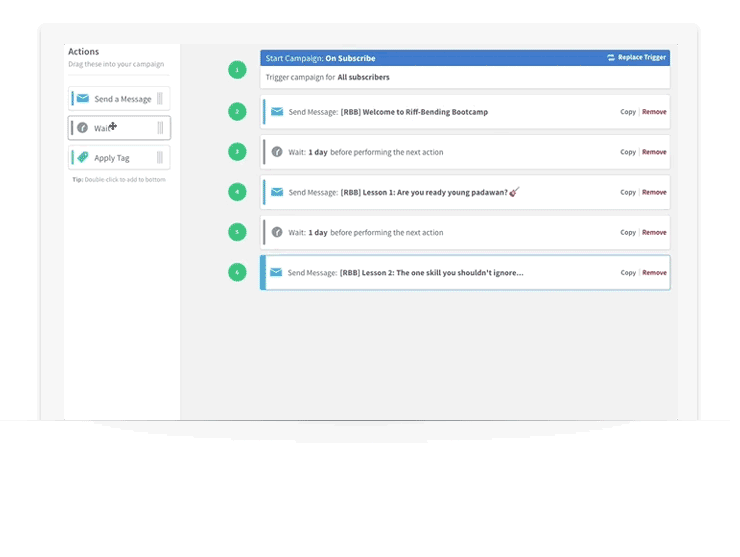
If you had any automated emails set up in Mailchimp, now’s the time to bring them over to AWeber so your new subscribers receive that content. Again, we can also help with that.
Setting up an automated series of emails in AWeber is a breeze. We have a drag-and-drop automation builder called Campaigns. You can set up as many automated emails as you’d like to deliver at a schedule of your choosing. This is perfect for follow-ups, email courses, email challenges, and more.
To get started with Campaigns, check out this tutorial.
Free Expert Migration Services
Our philosophy at AWeber is to let us do 90% of the work for you. We don’t want you to stress about migrating your subscribers, email templates, sign up forms, landing pages, and campaigns. That why we will help you migrate from Mailchimp to AWeber – for free.
Grow your business with AWeber
Congrats! You’ve switched to AWeber.
But growing your business with AWeber doesn’t stop here. There are hundreds of apps that integrate with AWeber, many of which you may already use, like Paypal, WordPress, and Etsy. AWeber also has advanced automation features like click and open automations to personalize the messages you send.
Be sure to subscribe to our weekly newsletter, FWD: Thinking. We’ll share best practices, new tactics, and inspiring ideas to help you keep your email marketing strategy effective and energizing.
And you can also check out our podcasts, pre-recorded video tutorials, and articles to help you go beyond the basics.
Have questions about email marketing or AWeber? Let us know! Our award-winning team is available to help 24 hours a day, 7 days a week!